徐州有哪些网络公司班级优化大师下载安装app
CentOS7静默安装oracle11g
- 一、下载Oracle11g安装包
- 二、开始安装oracle11g
- 三、配置Oracle监听程序
- 四、添加数据库实例
- 五、设置开机启动
- 六、登录后解除锁定
一、下载Oracle11g安装包
下载链接:https://pan.baidu.com/s/1gcLMFGX7-8ju7OoFOFLzQA
提取码:636s
也可在oracle官网下载
- 关闭防火墙
service iptables stop
systemctl stop firewalld
systemctl disable firewalld
- 关闭selinux
使用以下命令进入配置文件将SELINUX的值修改为disabled
vi /etc/selinux/config
# This file controls the state of SELinux on the system.
# SELINUX= can take one of these three values:
#     enforcing - SELinux security policy is enforced.
#     permissive - SELinux prints warnings instead of enforcing.
#     disabled - No SELinux policy is loaded.
SELINUX=disabled
# SELINUXTYPE= can take one of three two values:
#     targeted - Targeted processes are protected,
#     minimum - Modification of targeted policy. Only selected processes are protected.
#     mls - Multi Level Security protection.
SELINUXTYPE=targeted

使用setenforce 0使命令生效

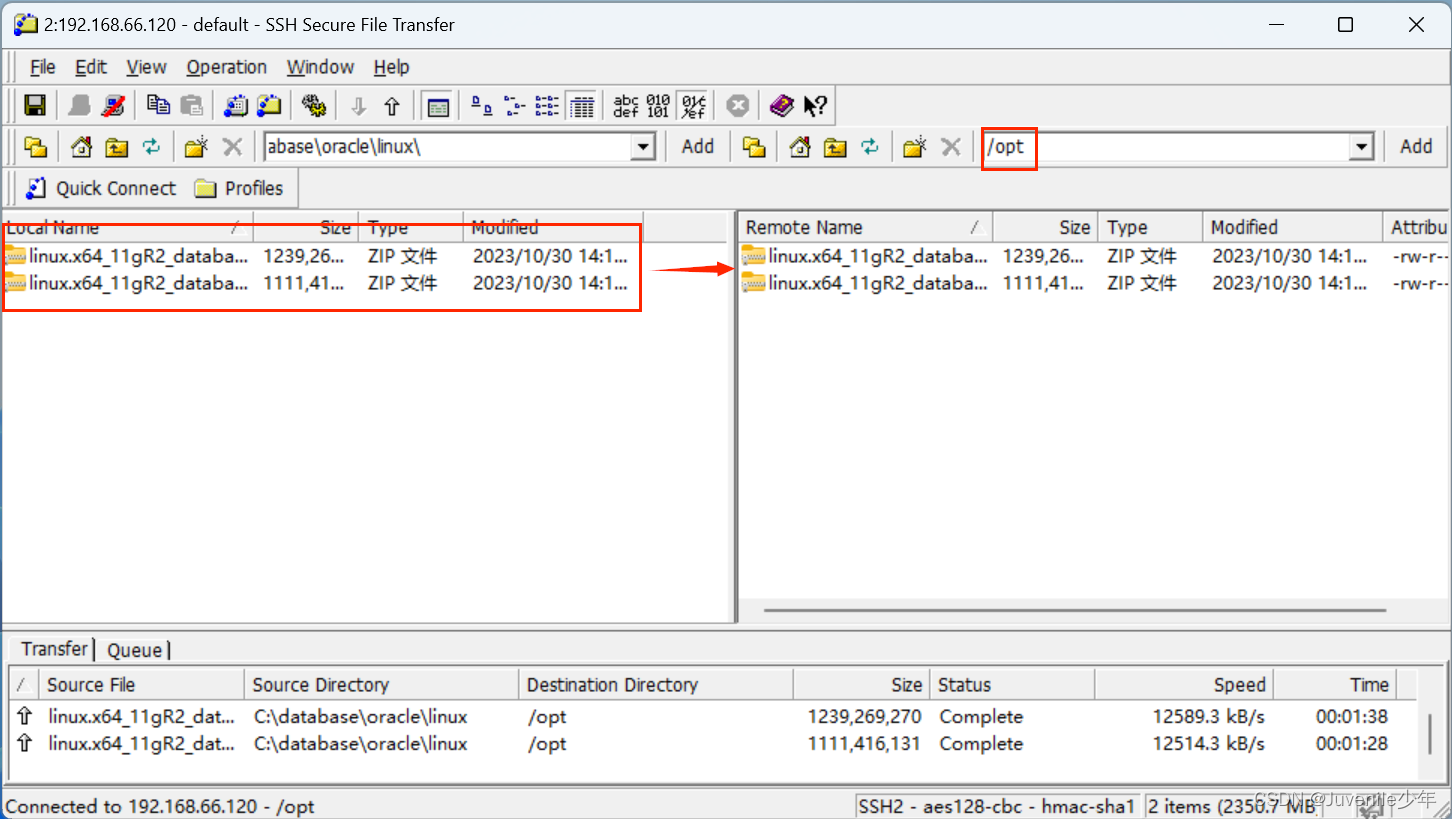
- 上传下载好的Oracle安装文件
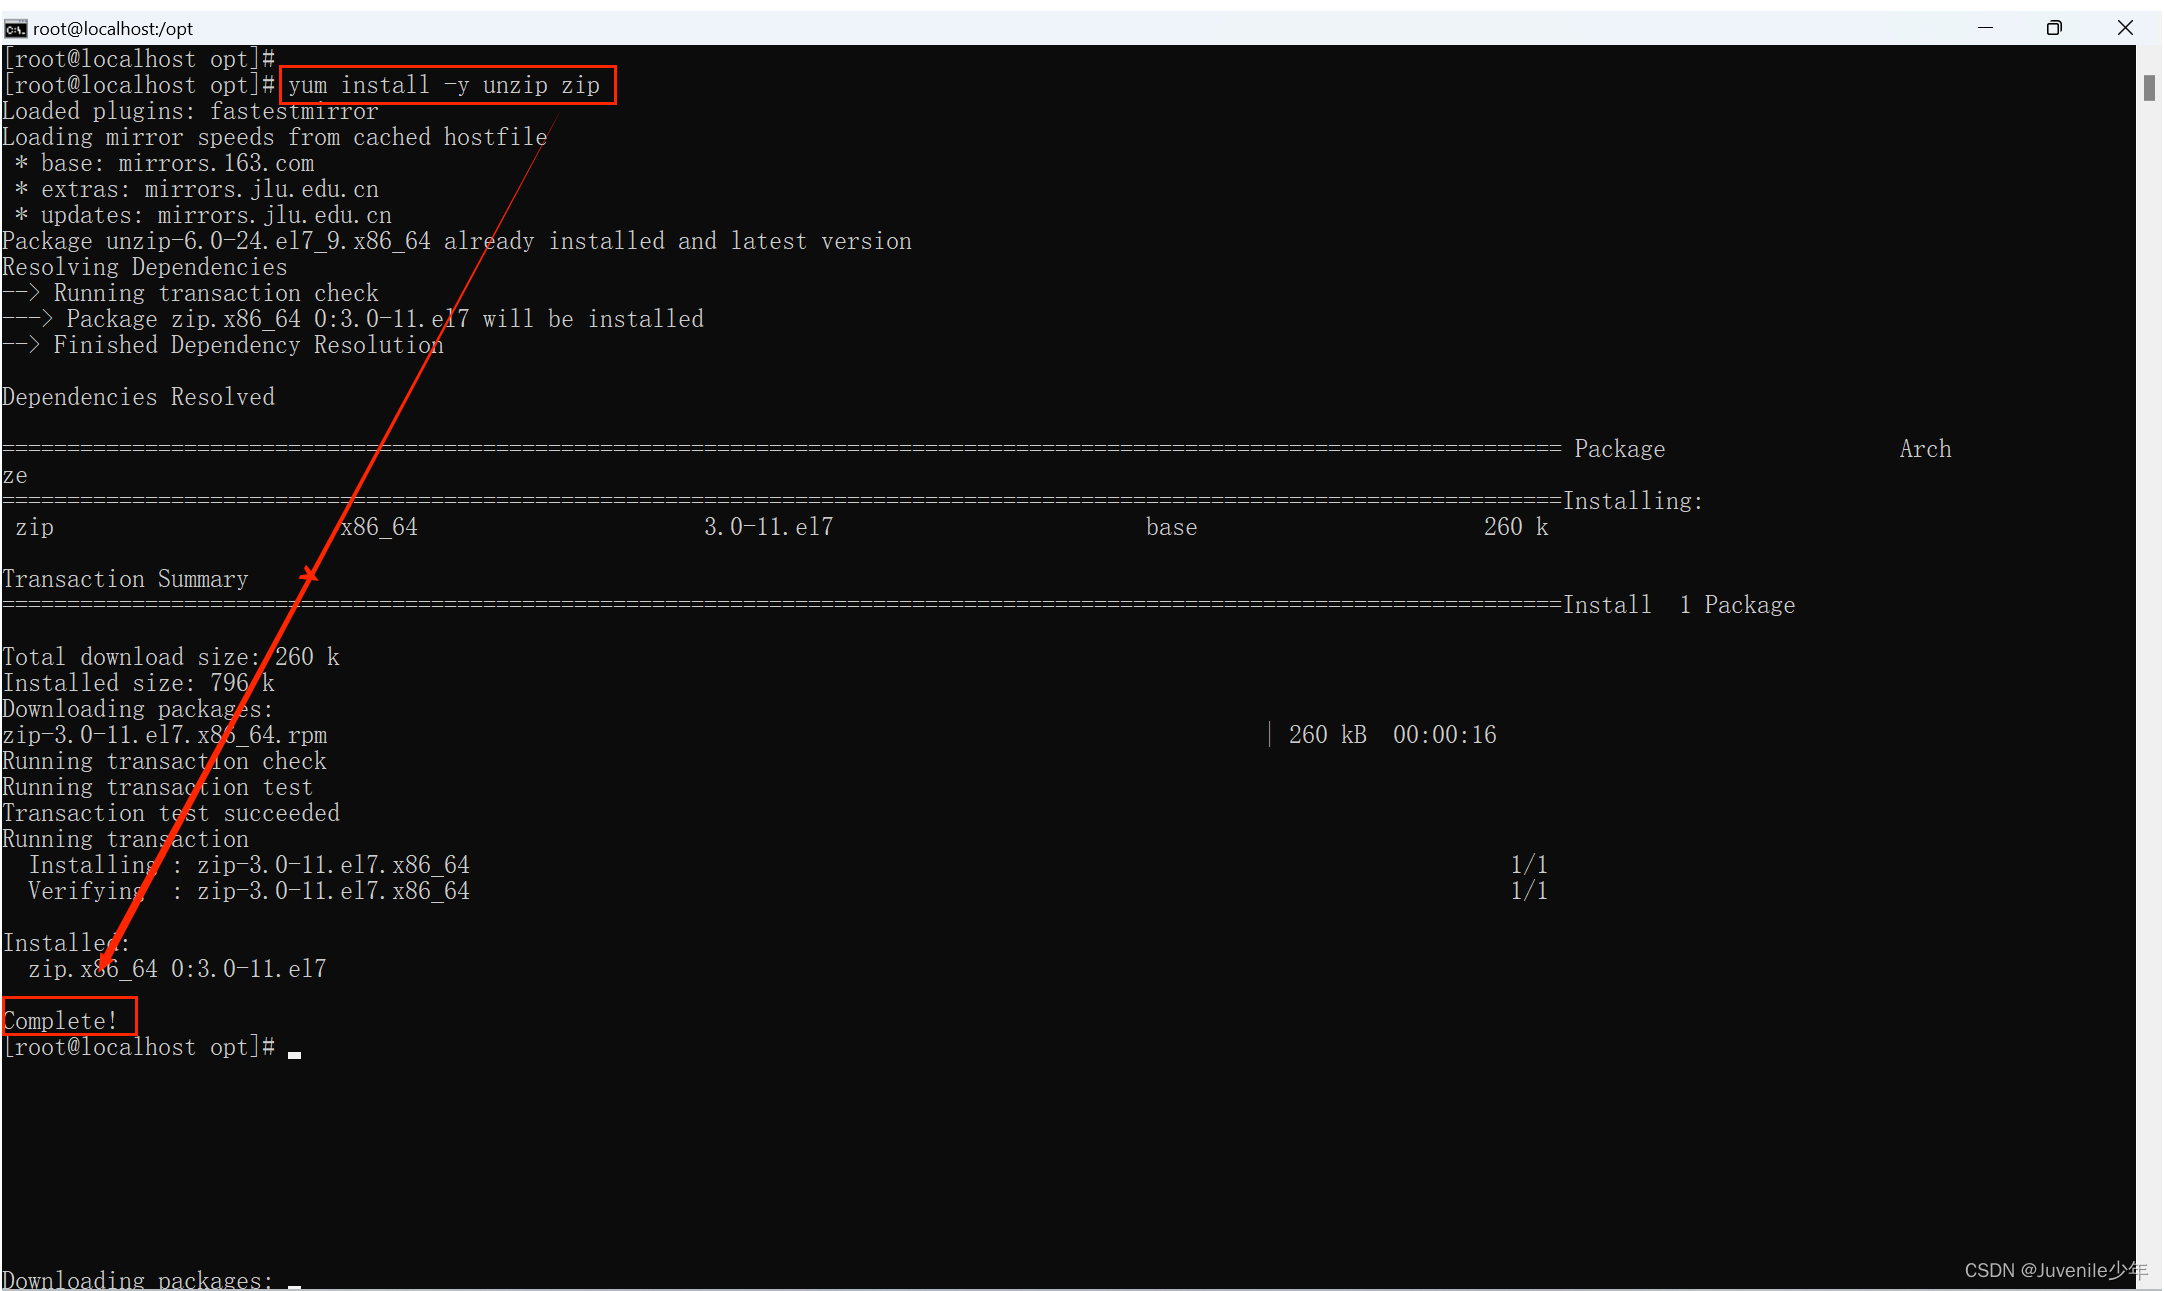
- 下载安装 unzip 软件,用来解压上传的Oracle安装文件
命令为yum install -y unzip zip
- 开始解压
unzip linux.x64_11gR2_database_1of2.zip
unzip linux.x64_11gR2_database_2of2.zip

二、开始安装oracle11g
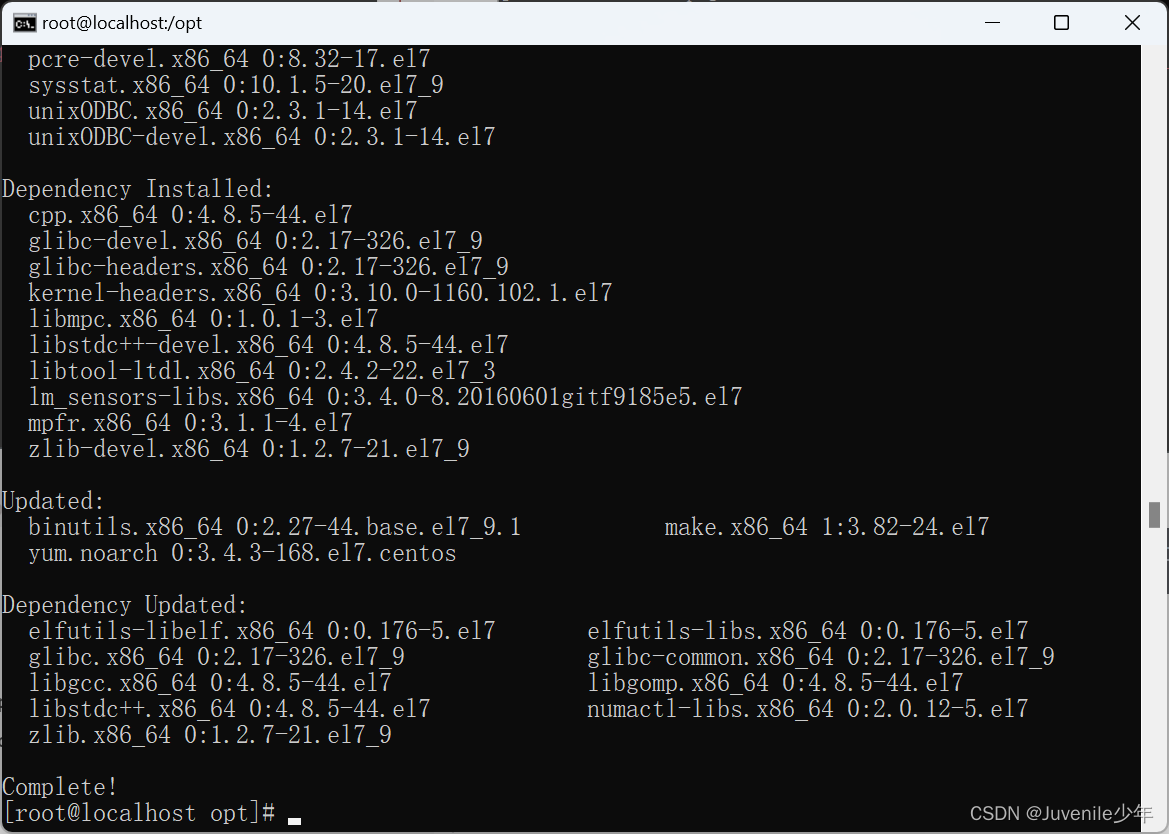
- 安装Oracle 11g依赖包
yum install yum install gcc make binutils gcc-c++ compat-libstdc++-33 elfutils-libelf-devel elfutils-libelf-devel-static ksh libaio libaio-devel numactl-devel sysstat unixODBC unixODBC-devel pcre-devel -y
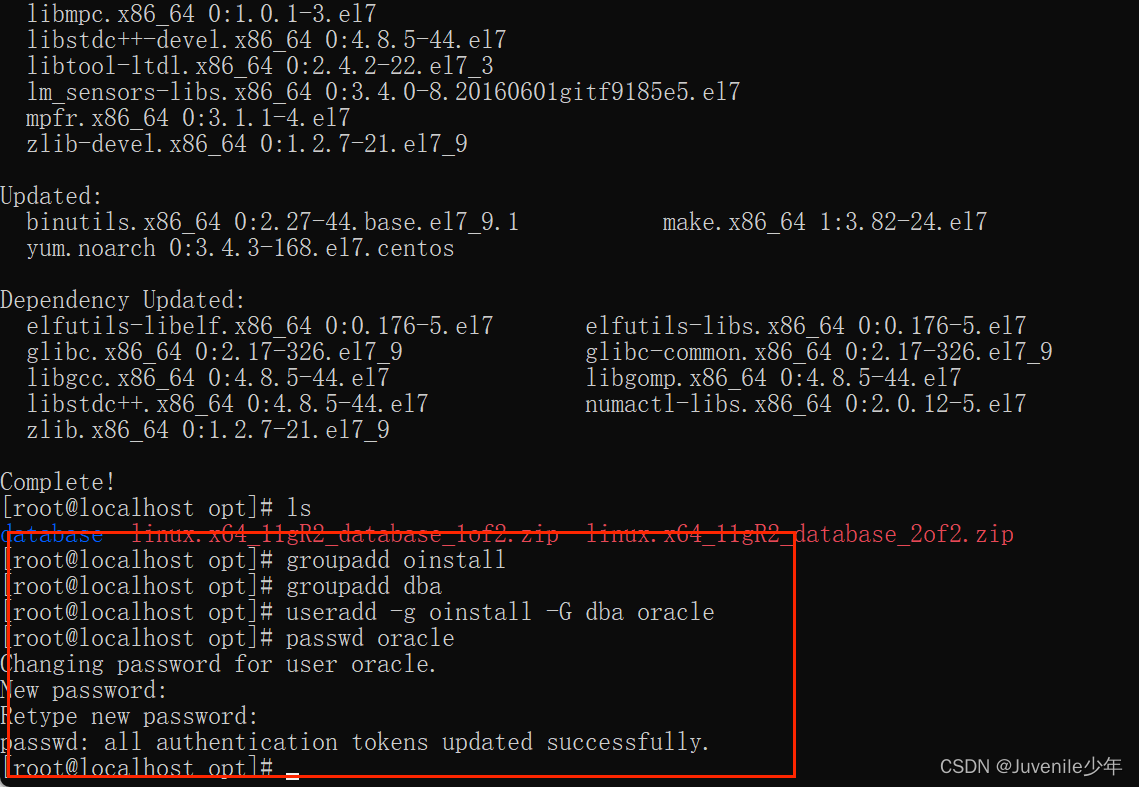
- 添加安装用户和用户组
[root@localhost opt]# groupadd oinstall
[root@localhost opt]# groupadd dba
[root@localhost opt]# useradd -g oinstall -G dba oracle
[root@localhost opt]# passwd oracle
Changing password for user oracle.
New password:              #输入密码时必须是字符+数字+特殊字符,否则不通过
Retype new password:
passwd: all authentication tokens updated successfully.
[root@localhost opt]#
- 修改参数
命令如下,进入相关配置文件
vi /etc/sysctl.conf
fs.aio-max-nr = 1048576
fs.file-max = 6815744
kernel.sem = 250 32000 100 128
kernel.shmall = 2097152
kernel.shmmax = 4294967295
kernel.shmmni = 4096
net.core.rmem_default = 262144
net.core.rmem_max = 4194304
net.core.wmem_default = 262144
net.core.wmem_max = 1048586
net.ipv4.ip_local_port_range = 9000 65500

使用sysctl -p使修改的参数立即生效

- 创建安装目录和设置文件权限
[root@localhost ~]# mkdir -p /u01/app/oracle/product/11.2.0
[root@localhost ~]# mkdir /u01/app/oracle/oradata
[root@localhost ~]# mkdir /u01/app/oracle/inventory
[root@localhost ~]# mkdir /u01/app/oracle/fast_recovery_area
[root@localhost ~]# chown -R oracle:oinstall /u01/app/oracle
[root@localhost ~]# chmod -R 775 /u01/app/oracle
- 设置oracle用户环境变量
[root@localhost ~]# su - oracle
[oracle@localhost ~]$ vi .bash_profile
[oracle@localhost ~]$
添加以下内容
ORACLE_BASE=/u01/app/oracle
ORACLE_HOME=$ORACLE_BASE/product/11.2.0
ORACLE_SID=orcl
PATH=$PATH:$ORACLE_HOME/bin
export ORACLE_BASE ORACLE_HOME ORACLE_SID PATH

- 编辑静默安装响应文件
[oracle@localhost ~]$ cp -R /opt/database/response/ .
[oracle@localhost ~]$ cd response/
[oracle@localhost response]$ vi db_install.rsp
[oracle@localhost response]$
将其中参数值修改为以下内容:
oracle.install.option=INSTALL_DB_SWONLY
UNIX_GROUP_NAME=oinstall
INVENTORY_LOCATION=/u01/app/oracle/inventory
SELECTED_LANGUAGES=en,zh_CN
ORACLE_HOME=/u01/app/oracle/product/11.2.0
ORACLE_BASE=/u01/app/oracle
oracle.install.db.InstallEdition=EE
oracle.install.db.DBA_GROUP=dba
oracle.install.db.OPER_GROUP=dba
oracle.install.db.config.starterdb.type=GENERAL_PURPOSE
oracle.install.db.config.starterdb.globalDBName=orcl
oracle.install.db.config.starterdb.SID=orcl
oracle.install.db.config.starterdb.characterSet=AL32UTF8
oracle.install.db.config.starterdb.memoryLimit=800
oracle.install.db.config.starterdb.password.ALL=oracle
DECLINE_SECURITY_UPDATES=true
- 安装Oracle主程序
进入相应的database目录执行安装命令
[oracle@localhost response]$ cd /opt/database/
[oracle@localhost database]$ ./runInstaller -silent -responseFile /home/oracle/response/db_install.rsp -ignorePrereq
等待一段时间…(时间的话看机器性能)
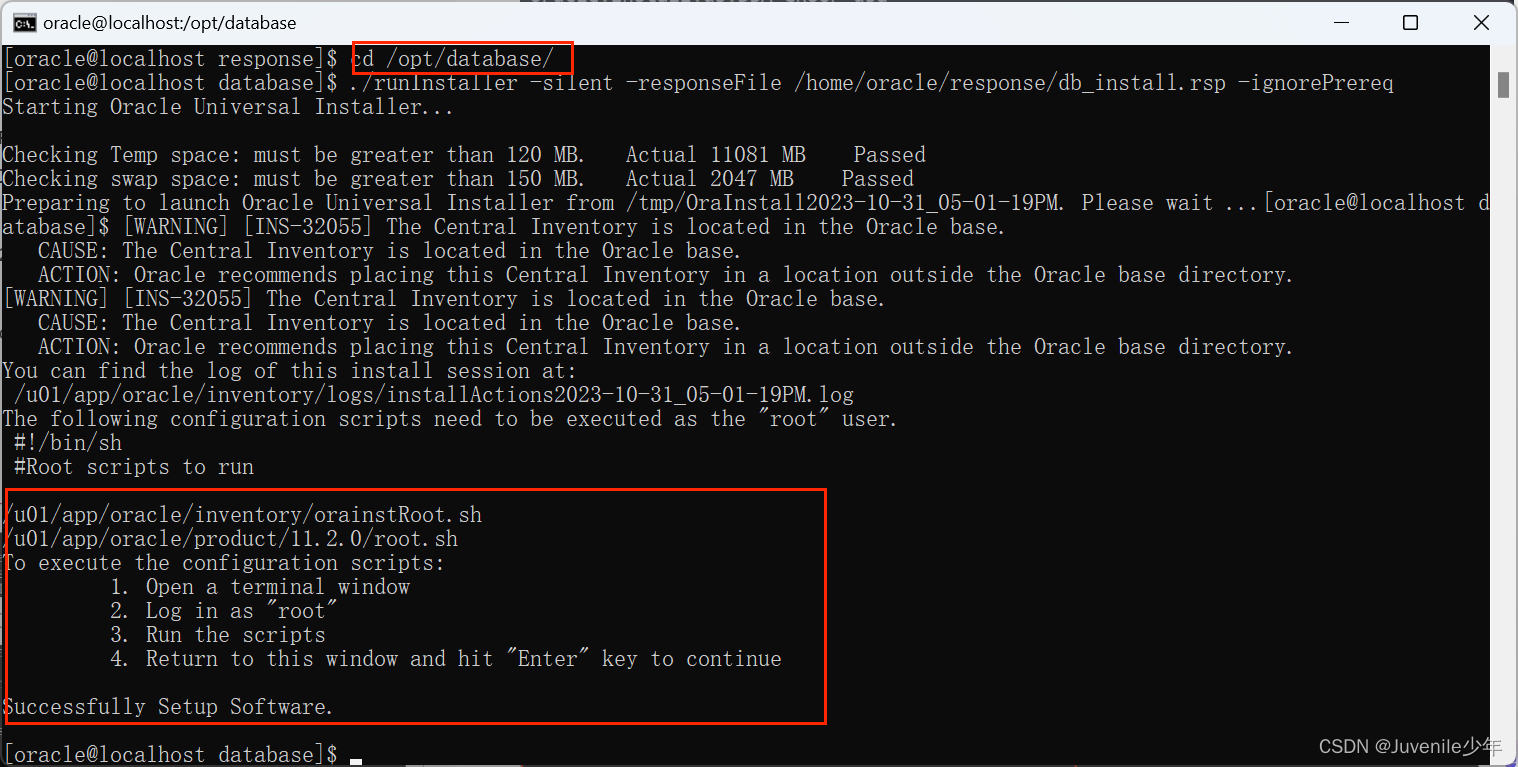
出现如上图所示信息,说明主程序安装成功安装成功。
三、配置Oracle监听程序
- 打开一个新命令窗口
执行以下命令:
sh /u01/app/oracle/inventory/orainstRoot.sh
sh /u01/app/oracle/product/11.2.0/root.sh
执行后结果如下:
C:\Users\en>ssh root@192.168.66.120
root@192.168.66.120's password:
Last login: Tue Oct 31 16:57:07 2023 from 192.168.66.1
[root@localhost ~]# sh /u01/app/oracle/inventory/orainstRoot.sh
Changing permissions of /u01/app/oracle/inventory.
Adding read,write permissions for group.
Removing read,write,execute permissions for world.Changing groupname of /u01/app/oracle/inventory to oinstall.
The execution of the script is complete.
[root@localhost ~]# sh /u01/app/oracle/product/11.2.0/root.sh
Check /u01/app/oracle/product/11.2.0/install/root_localhost.localdomain_2023-10-31_17-42-41.log for the output of root script
[root@localhost ~]#
- 切换回oracle用户,依次执行如下命令
source .bash_profile
netca /silent /responsefile /home/oracle/response/netca.rsp
执行结果如下:
[oracle@localhost ~]$ source .bash_profile
[oracle@localhost ~]$ netca /silent /responsefile /home/oracle/response/netca.rspParsing command line arguments:Parameter "silent" = trueParameter "responsefile" = /home/oracle/response/netca.rsp
Done parsing command line arguments.
Oracle Net Services Configuration:
Configuring Listener:LISTENER
Listener configuration complete.
Oracle Net Listener Startup:Running Listener Control:/u01/app/oracle/product/11.2.0/bin/lsnrctl start LISTENERListener Control complete.Listener started successfully.
Profile configuration complete.
Oracle Net Services configuration successful. The exit code is 0
[oracle@localhost ~]$
查看1521端口是否启动,示例如下:
[oracle@localhost ~]$ netstat -tnulp| grep 1521
(Not all processes could be identified, non-owned process infowill not be shown, you would have to be root to see it all.)
tcp6       0      0 :::1521                 :::*                    LISTEN      9026/tnslsnr
[oracle@localhost ~]$
如若使用netstat报错,可以在root用户下执行yum install net-tools安装net-tools工具。
- 关于监听的开启和关闭
开启监听:/u01/app/oracle/product/11.2.0/bin/lsnrctl start
关闭监听:/u01/app/oracle/product/11.2.0/bin/lsnrctl stop
四、添加数据库实例
- 编辑数据库实例文件
vi /home/oracle/response/dbca.rsp
修改以下参数
GDBNAME = "orcl"
SID = "orcl"
SYSPASSWORD = "oracle"
SYSTEMPASSWORD = "oracle"
SYSMANPASSWORD = "oracle"
DBSNMPPASSWORD = "oracle"
DATAFILEDESTINATION =/u01/app/oracle/oradata
RECOVERYAREADESTINATION=/u01/app/oracle/fast_recovery_area
CHARACTERSET = "ZHS16GBK"
TOTALMEMORY = "1638"
其中TOTALMEMORY = “1638” 为1638MB,物理内存2G*80%。TOTALMEMORY的值 要根据自己实际的内存去分配
- 执行以下命令
dbca -silent -responseFile /home/oracle/response/dbca.rsp
执行后示例如下:
[oracle@localhost ~]$ dbca -silent -responseFile /home/oracle/response/dbca.rsp
Copying database files
1% complete
3% complete
11% complete
18% complete
26% complete
37% complete
Creating and starting Oracle instance
40% complete
45% complete
50% complete
55% complete
56% complete
60% complete
62% complete
Completing Database Creation
66% complete
70% complete
73% complete
85% complete
96% complete
100% complete
Look at the log file "/u01/app/oracle/cfgtoollogs/dbca/orcl/orcl.log" for further details.
- 检查实例进程
[oracle@localhost ~]$ ps -ef | grep ora_ | grep -v grep
oracle    11293      1  0 18:46 ?        00:00:00 ora_pmon_orcl
oracle    11295      1  0 18:46 ?        00:00:01 ora_vktm_orcl
oracle    11299      1  0 18:46 ?        00:00:00 ora_gen0_orcl
oracle    11301      1  0 18:46 ?        00:00:00 ora_diag_orcl
oracle    11303      1  0 18:46 ?        00:00:00 ora_dbrm_orcl
oracle    11305      1  0 18:46 ?        00:00:00 ora_psp0_orcl
oracle    11307      1  0 18:46 ?        00:00:00 ora_dia0_orcl
oracle    11309      1  0 18:46 ?        00:00:00 ora_mman_orcl
oracle    11311      1  0 18:46 ?        00:00:00 ora_dbw0_orcl
oracle    11313      1  0 18:46 ?        00:00:00 ora_lgwr_orcl
oracle    11315      1  0 18:46 ?        00:00:00 ora_ckpt_orcl
oracle    11317      1  0 18:46 ?        00:00:00 ora_smon_orcl
oracle    11319      1  0 18:46 ?        00:00:00 ora_reco_orcl
oracle    11321      1  0 18:46 ?        00:00:00 ora_mmon_orcl
oracle    11323      1  0 18:46 ?        00:00:00 ora_mmnl_orcl
oracle    11325      1  0 18:46 ?        00:00:00 ora_d000_orcl
oracle    11327      1  0 18:46 ?        00:00:00 ora_s000_orcl
oracle    11339      1  0 18:46 ?        00:00:00 ora_qmnc_orcl
oracle    11373      1  0 18:46 ?        00:00:00 ora_cjq0_orcl
oracle    11522      1  0 18:46 ?        00:00:00 ora_q000_orcl
oracle    11524      1  0 18:46 ?        00:00:00 ora_q001_orcl
[oracle@localhost ~]$
- 查看监听zhuangtai
[oracle@localhost ~]$ lsnrctl statusLSNRCTL for Linux: Version 11.2.0.1.0 - Production on 31-OCT-2023 18:50:27Copyright (c) 1991, 2009, Oracle.  All rights reserved.Connecting to (DESCRIPTION=(ADDRESS=(PROTOCOL=TCP)(HOST=localhost)(PORT=1521)))
STATUS of the LISTENER
------------------------
Alias                     LISTENER
Version                   TNSLSNR for Linux: Version 11.2.0.1.0 - Production
Start Date                31-OCT-2023 18:08:07
Uptime                    0 days 0 hr. 42 min. 20 sec
Trace Level               off
Security                  ON: Local OS Authentication
SNMP                      OFF
Listener Parameter File   /u01/app/oracle/product/11.2.0/network/admin/listener.ora
Listener Log File         /u01/app/oracle/diag/tnslsnr/localhost/listener/alert/log.xml
Listening Endpoints Summary...(DESCRIPTION=(ADDRESS=(PROTOCOL=tcp)(HOST=localhost)(PORT=1521)))
Services Summary...
Service "orcl" has 1 instance(s).Instance "orcl", status READY, has 1 handler(s) for this service...
Service "orclXDB" has 1 instance(s).Instance "orcl", status READY, has 1 handler(s) for this service...
The command completed successfully
[oracle@localhost ~]$
- 登录查看实例状态
[oracle@localhost ~]$ sqlplus / as sysdbaSQL*Plus: Release 11.2.0.1.0 Production on Tue Oct 31 18:52:23 2023Copyright (c) 1982, 2009, Oracle.  All rights reserved.Connected to:
Oracle Database 11g Enterprise Edition Release 11.2.0.1.0 - 64bit Production
With the Partitioning, OLAP, Data Mining and Real Application Testing optionsSQL> select status from v$instance;STATUS
------------
OPENSQL> quit
Disconnected from Oracle Database 11g Enterprise Edition Release 11.2.0.1.0 - 64bit Production
With the Partitioning, OLAP, Data Mining and Real Application Testing options
[oracle@localhost ~]$
五、设置开机启动
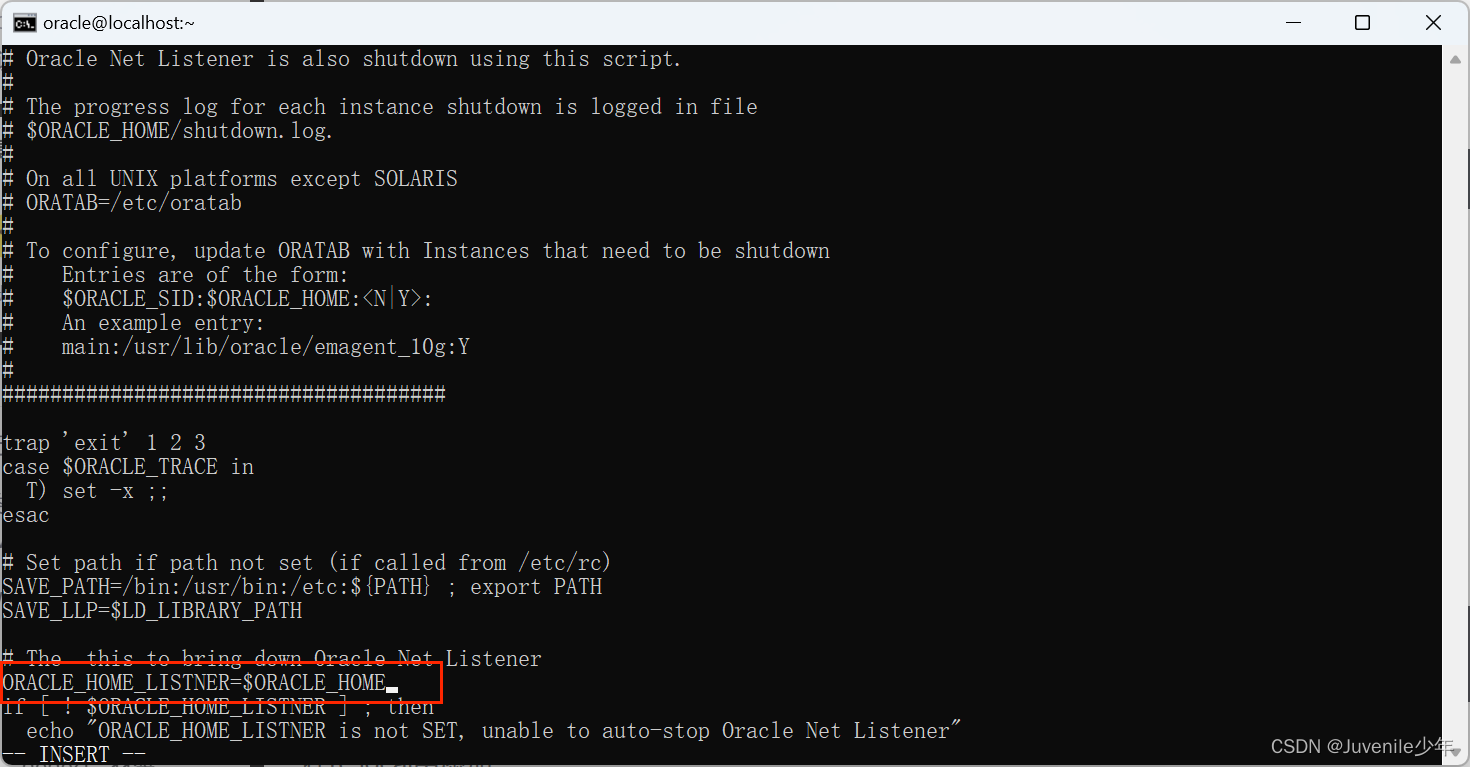
- 修改
/u01/app/oracle/product/11.2.0/bin路径下的dbstart dbshut脚本,将两个脚本中的ORACLE_HOME_LISTNER=$1,修改为ORACLE_HOME_LISTNER=$ORACLE_HOME
[oracle@localhost ~]$ vi /u01/app/oracle/product/11.2.0/bin/dbstart
[oracle@localhost ~]$ vi /u01/app/oracle/product/11.2.0/bin/dbshut
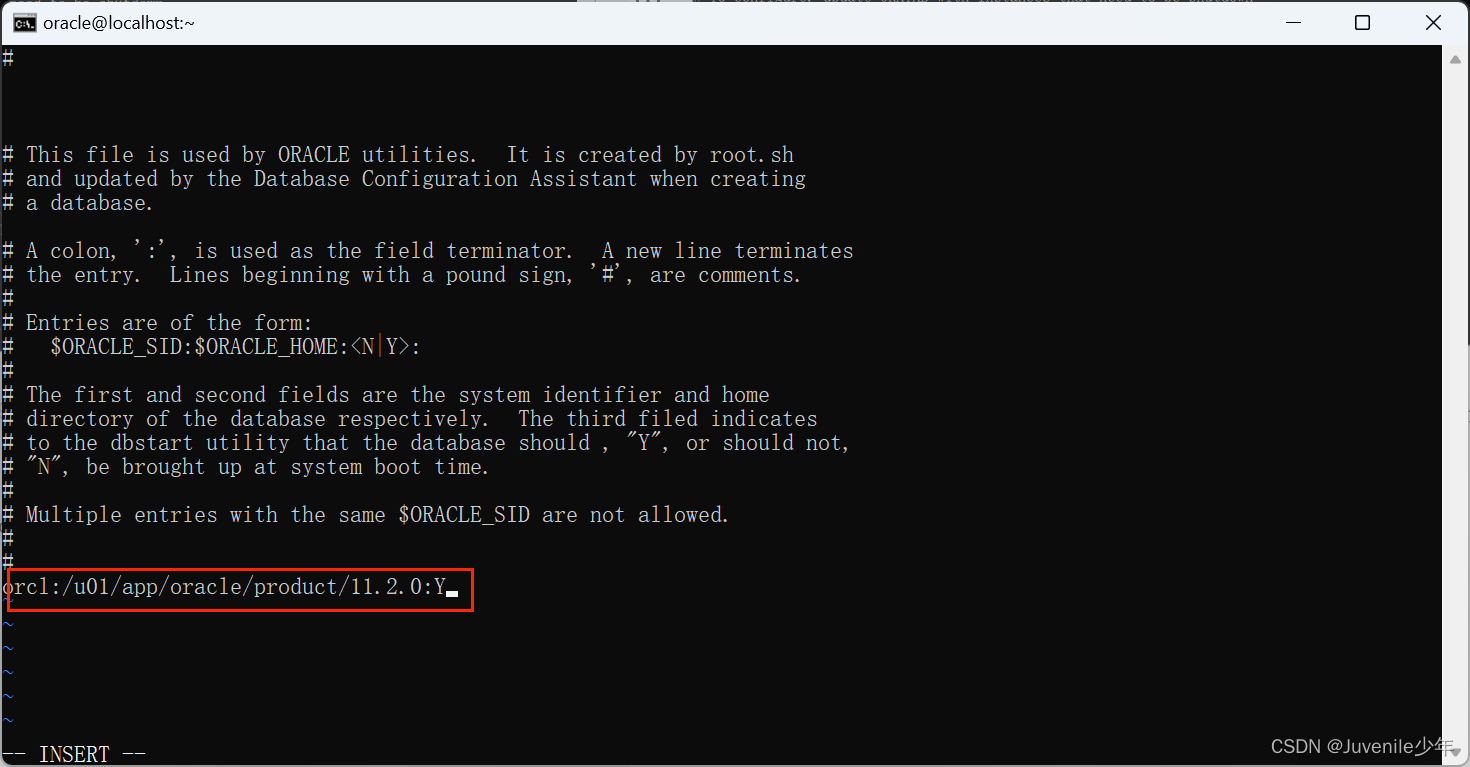
- 修改
/etc/oratab文件,将orcl:/u01/app/oracle/product/11.2.0:N中最后的N改为Y,成为orcl:/u01/app/oracle/product/11.2.0:Y
vi /etc/oratab
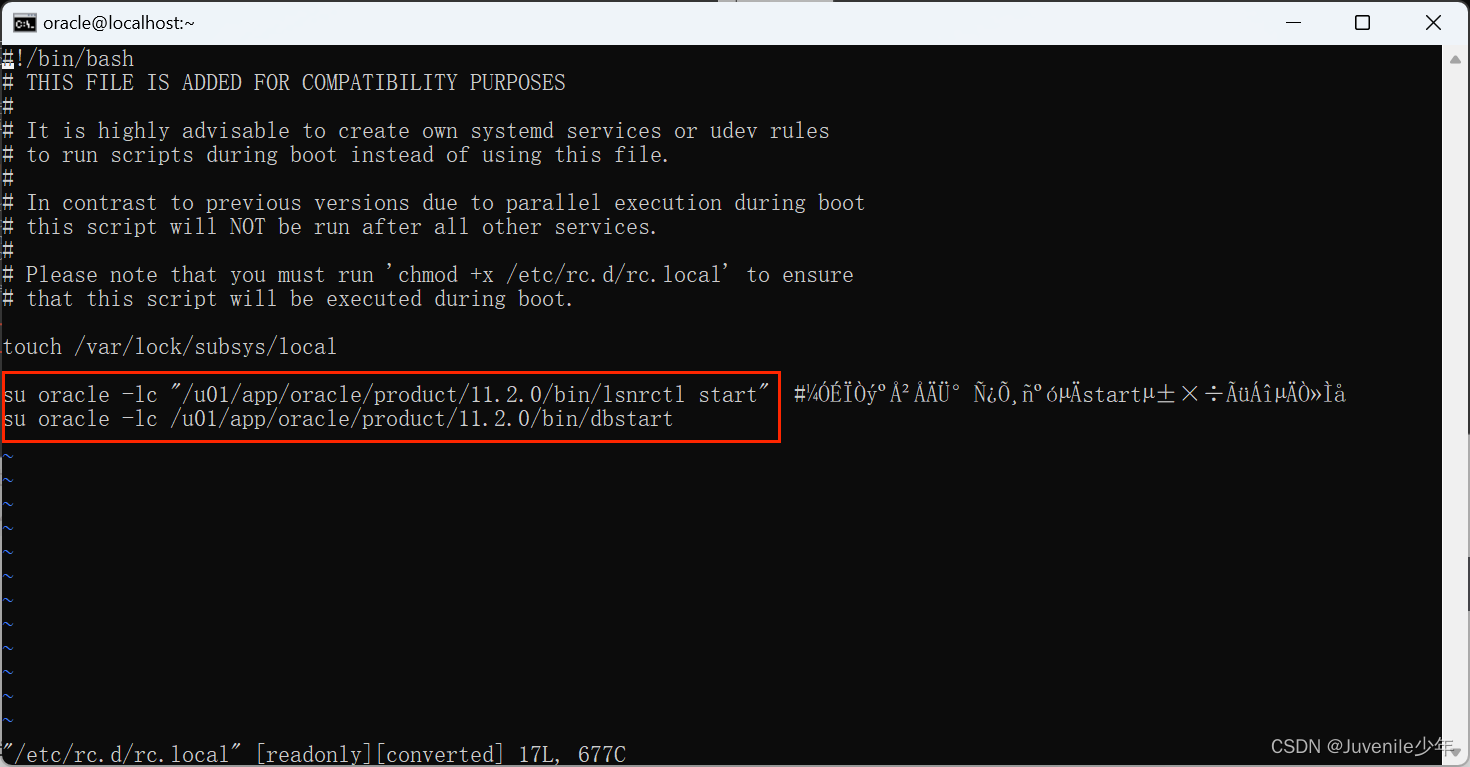
- 修改rc.local文件
[oracle@localhost ~]$ vi /etc/rc.d/rc.local
添加以下内容:
su oracle -lc "/u01/app/oracle/product/11.2.0/bin/lsnrctl start"  #加上引号才能把空格后的start,当作命令的一部分
su oracle -lc /u01/app/oracle/product/11.2.0/bin/dbstart
- 重启后执行
netstat -tpln,示例如下:
[oracle@localhost ~]$ netstat -tpln
(Not all processes could be identified, non-owned process infowill not be shown, you would have to be root to see it all.)
Active Internet connections (only servers)
Proto Recv-Q Send-Q Local Address           Foreign Address         State       PID/Program name
tcp        0      0 0.0.0.0:22              0.0.0.0:*               LISTEN      -
tcp        0      0 127.0.0.1:25            0.0.0.0:*               LISTEN      -
tcp6       0      0 :::1521                 :::*                    LISTEN      1032/tnslsnr
tcp6       0      0 :::28084                :::*                    LISTEN      1319/ora_d000_orcl
tcp6       0      0 :::22                   :::*                    LISTEN      -
tcp6       0      0 ::1:25                  :::*                    LISTEN      -
[oracle@localhost ~]$
发现有1521监听端口存在,配置成功
六、登录后解除锁定
[oracle@localhost ~]$ source .bash_profile
[oracle@localhost ~]$ sqlplus / as sysdbaSQL*Plus: Release 11.2.0.1.0 Production on Tue Oct 31 19:23:34 2023Copyright (c) 1982, 2009, Oracle.  All rights reserved.Connected to:
Oracle Database 11g Enterprise Edition Release 11.2.0.1.0 - 64bit Production
With the Partitioning, OLAP, Data Mining and Real Application Testing optionsSQL> alter user SYSTEM account unlock;User altered.SQL>
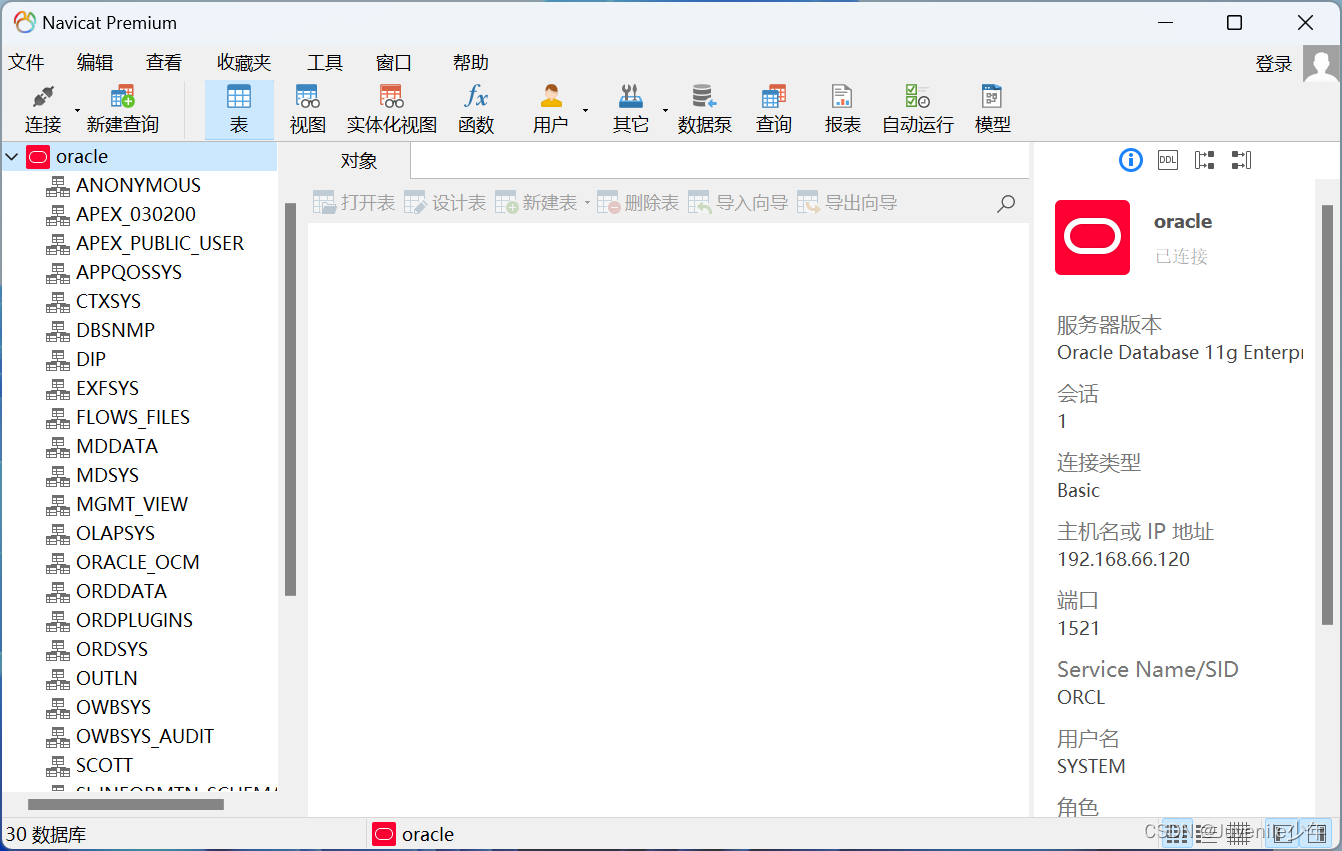
- 配置navicat
用navicat连接测试
用户名:SYSTEM
密码:oracle
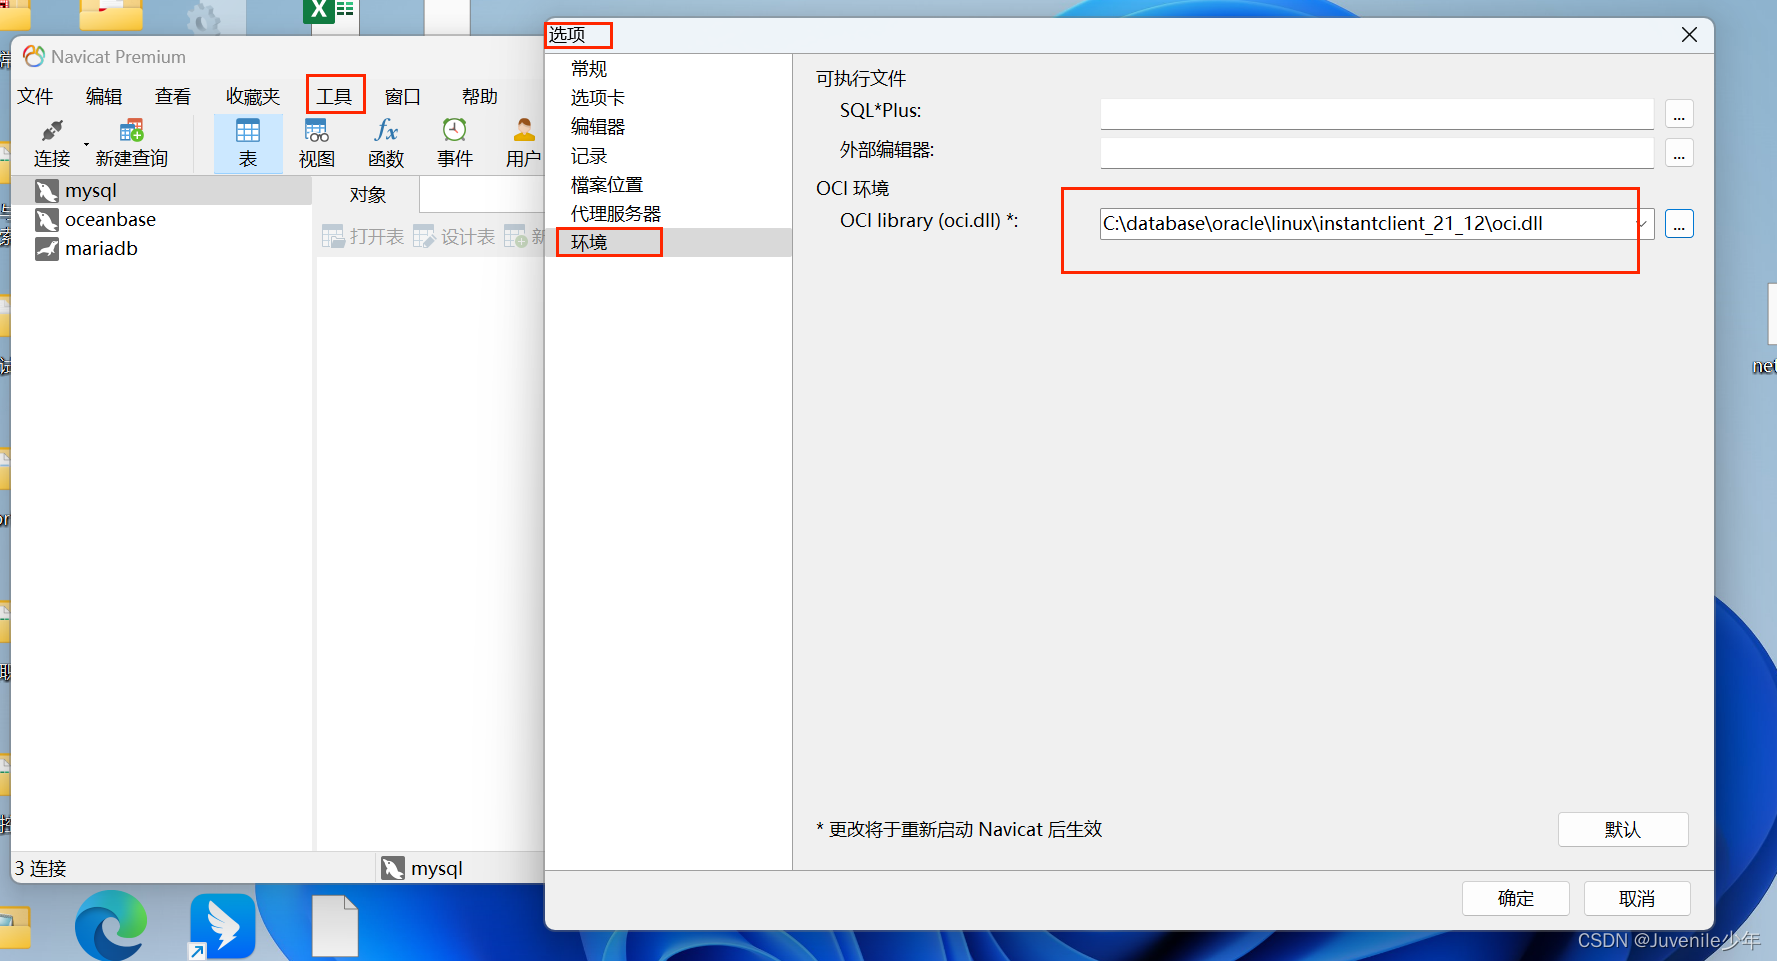
此时可能会报错如下图所示oracle library is not loaded
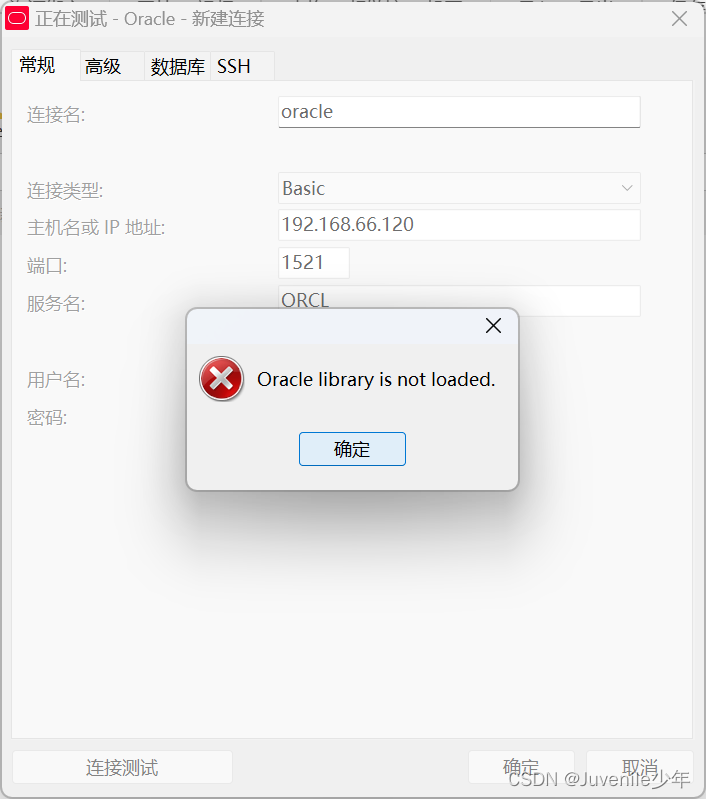
进入https://www.oracle.com/database/technologies/instant-client/winx64-64-downloads.html下载如下图所示文件

解压文件,将 oci.dll ,文件路径拷贝到OCI环境,重启Navicat 即可。